Showing posts with label Tutorial. Show all posts

Thursday, 29 May 2014

Triple Time Stamping with Stampin' Up! Creative Elements

Triple Time Stamping with Stampin' Up! Creative Elements


I haven't used the Triple Time Stamping technique for a while but I thought it would work well with this Stampin' Up! stamp set - Creative Elements. I first saw this technique a couple of years ago featured by an American Demo, Dawn Olchefske. If you check out this post you will find the card measurements I used & a quick tutorial. The colours are Rose Red, Crumb Cake and Very Vanilla.

Once the images were stamped and the layers re-assembled I finished the card with some ribbons - Victoria Crochet Trim, Linen Thread and Crumb Cake Taffeta.  I think it is such an effecive technique - seriously the hardest part is cutting the layers!


Here are the main Stampin' Up! supplies used today. Remember you can now order online if you prefer - if you click on the image you will be directed to my online store where you can pop them into your shopping basket. If you would prefer not to order online please either email me or give me a call on07530 368466 and I will be happy to help.


CHOOSE AN EXCLUSIVE PHOTOPOLYMER STAMP SET WITH EVERY £60 (excluding P&P) YOU SPEND - MORE DETAILS HERE - Show and Tell 2 is now the only set available and only while stocks last so don't miss out!

Tuesday, 29 April 2014

Gift Boxes with Stampin' Up! Soho Subway

Gift Boxes with Stampin' Up! Soho Subway


I made these gift boxes ages ago but never shared them with you.  I absolutely love this Stampin' Up! Designer Series Paper - it is called Soho Subway and and this pattern is probably my favourite of all the the DSP in the catalogue!  

To make the box I started with a tutorial from my fabulously talented friend and fellow demonstrator Sam Donald - aka Pootles.  I had to alter the size of the box to fit the contents - bars of chocolate - but that was simple enough.

I used Early Espresso & Crisp Cantaloupe card as they match the paper perfectly - don't you just love that about Stampin' Up!?  The sentiment is from the Itty Bitty Banners stamp set, cut using the Big Shot and Bitty Banners Framelits Dies. Two Scallop Circle Punches (1 3/4" & 1 1/4") were layered with a Very Vintage Designer Button tied with Linen Thread. The box is tied with a length of Victoria Crochet Trim.


So what do you think? I think they were well received - I know the contents were!

Here are the main Stampin' Up! supplies used to make today's card. Remember you can now order online if you prefer - if you click on the image you will be directed to my online store where you can pop them into your shopping basket. If you would prefer not to order online please either email me or give me a call on07530 368466 and I will be happy to help.


Friday, 25 April 2014

Steampunk & Cogs with Stampin' Up! Clockworks

Steampunk & Cogs with Stampin' Up! Clockworks


So Clockworks was ANOTHER Stampin' Up! stamp set which I had bought as I loved it and then NEVER used as I wasn't sure how to use it......  Steampunk is bang on trend and is defined as "a genre of science fiction that typically features steam-powdered machinery rather than advanced technology" - well this card fits the bill perfectly.

As soon as I saw the Starburst Framelits Dies I knew they would make perfect cogs when combined with the Circles Collection Framelits. The picture below shows how to layer up the framelits before running them through the Big Shot:


So to the card. I  used Soft Suede and Crushed Curry ink and the Clockworks stamp set to stamp the background and added Old Olive & Crumb Cake splodges and splashes using the Gorgeous Grunge stamp set.  I then sprizted the card using Crumb Cake re inker and rubbing alcohol.  I cut out several cogs as shown above and built them up - I am not sure an engineer would approve of my configuration though!  

The sentiment is from the Perfect Pennants stamp set and cut using the Banners Framelits Dies (don't forget you can save 15% buying these as a bundle)  I layered it on Linen Thread - I seem to be using rather a lot of this at the moment!


I have to say I was really pleased with how this turned out - I am loving the distressed grungy style right now and this was fun to make.

Here are the main Stampin' Up! supplies used to make today's card. Remember you can now order online if you prefer - if you click on the image you will be directed to my online store where you can pop them into your shopping basket. If you would prefer not to order online please either email me or give me a call on07530 368466 and I will be happy to help. 


Sunday, 20 April 2014

Where's he going? An Easter Bunny with Stampin' Up! Punches

Where's he going? An Easter Bunny with Stampin' Up! Punches


Happy Easter! I wanted to make a fun card for today. I don't normally do "cutesy" but the dogs and I saw loads of rabbits when we were walking early the other morning and their cotton tails made me smile as they hopped away!

I used the Hardwood stamp to make the fence (Early Espresso ink on Baked Brown Sugar card) and added some Old Olive "lichens" using the Gorgeous Grunge stamp set.  The hole was cut using the Circles Collection Framelits. I then grabbed some punches and had a play to make a bunny bottom and head.  Lots of sponging and gluing later I came up with the design.

The card was finished by stamping the grass from the Wetlands stamp set - after all the grass is always greener on the other side! 


If you click on the picture below you can see which Stampin' Up! Punches I used to make the bunny.


So what do you think? Hopefully the recipients liked them!

Here are the main Stampin' Up! supplies used to make today's card. Remember you can now order online if you prefer - if you click on the image you will be directed to my online store where you can pop them into your shopping basket. If you would prefer not to order online please either email me or give me a call on07530 368466 and I will be happy to help.


I haven't listed the punches as you may want to use ones you already have - however if you click here you can browse ALL the Stampin' Up! Punches.
.

Thursday, 16 May 2013

Treat Box with T Lights and Stampin' Up! Washi Tape

Today's project is a cute box containing decorated T Lights - a perfect thank you gift. I first saw this idea demonstrated by Amanda Fowler at a Pinkies team training event a couple of years ago - thank you Amanda!


With the introduction of the Simply Scored Scoring Tool this box is now super speedy to make.  I have done a quick tutorial to show how easy it is.  

The box base was made from a piece of Calypso Coral card cut to 7 1/2" x 4 3/4": ( I am so glad this colour is staying with us as part of the Colour Refresh!)


 Score on each side at 3/4" and 1 1/2":


 Fold and cut along the score lines as shown:


Assemble the box using Tombow Multipurpose Glue or Sticky Strip (I prefer the glue as it gives you a bit of "slide")


 The sleeve is a piece of Baja Breeze (retiring so get it while you can!) card cut to 6" x 4 1/2"


Stamp the card - here an image from the Bordering on Romance stamp set was stamped all over using Baja Breeze ink.


Score at 7/8", 2 3/4", 3 5/8" and 5 1/2" as shown:


Using a Framelit from Apothecary Accents Framelits and the Big Shot cut an aperture in the sleeve. Stick a piece of Window Sheet behind the aperture to prevent the contents falling out of the box! 


Fold along the score marks and stick the sleeve together.


A tag was stamped using the sentiment from Kindness Matters and cut out using the Hearts a Flutter Framelits. Punch out a flower using the Itty Bitty Punch Pack finish with a Pearl Basic Jewel.  


Have you noticed the T Lights have had a make-over? I used the fabulous NEW Epic Day This and That Designer Washi Tape to decorate them. A genius idea suggested by the super talented Sam Donald.  And of course because this is Stampin' Up! the Calypso Coral colour matches perfectly!  


The box was then tied up with a piece of the gorgeous Calypso Coral Ruffled Ribbon. And there you go - all ready to go!


Hope you find this useful - I would love to hear from you if you make this so don't forget to leave me a comment.


Here is a list of the Stampin' Up! Products used to make today's project:

Stamp Sets: Bordering on Romance, Kindness Matters
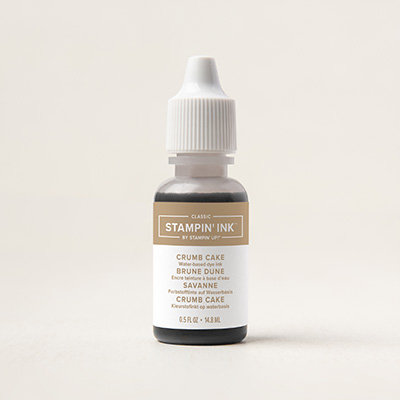
Inks: Baja Breeze
Cardstock: Calypso Coral, Baja Breeze, Naturals Ivroy
Punches: Itty Bitty
Big Shot: Apothecary Accents Framelits, Hearts a Flutter Framelits
Other: Calypso Coral Ruffled Ribbon, Linen Thread, Pearl Basic Jewels, This and That Washi Tape, Window Sheet, Simply Scored Scoring Tool

Don't forget that the discontinued colours (card, ink and accessories) are only available while stocks last so don't leave it too late if you NEED to stock up on your favourites!

If you would like to order any of these products please either email me or give me a call on07530 368466 and I will be happy to help.